The delicate process of removing a CPU (Central Processing Unit) from a motherboard requires precision and care. Whether you’re upgrading your processor, troubleshooting, or simply exploring the inner workings of your computer, understanding the steps involved in safely removing a CPU is essential. In this guide, we’ll provide you with a step-by-step walkthrough on how to remove a CPU from a motherboard, addressing common concerns and offering insights into the intricacies of CPU removal.
The Importance of Safe CPU Removal
Removing a CPU from a motherboard is a delicate procedure that, when done correctly, ensures the integrity of your system. Whether you’re replacing the CPU or performing maintenance, following proper steps is crucial to avoid damage to both the processor and the motherboard.

Related Article: How To Replace Motherboard? Complete Guide
When Is CPU Removal Necessary?
CPU removal becomes necessary in various scenarios, including upgrading to a more powerful processor, troubleshooting hardware issues, or dismantling a system for cleaning or maintenance. Understanding when and why to remove a CPU is the first step in the process.
How to Remove a CPU from a Motherboard?
1) Preparation
Before you begin, ensure you have a clean and organized workspace. Gather essential tools such as an antistatic wrist strap, a Phillips screwdriver, and thermal paste if you plan to reseat the CPU.
2) Remove the CPU Cooler
If your CPU is fitted with a cooler, start by removing it. Unscrew the cooler from the mounting brackets, and gently detach it from the CPU. This step may involve unplugging the CPU fan cable from the motherboard.

3) Unlock and Release the CPU Socket
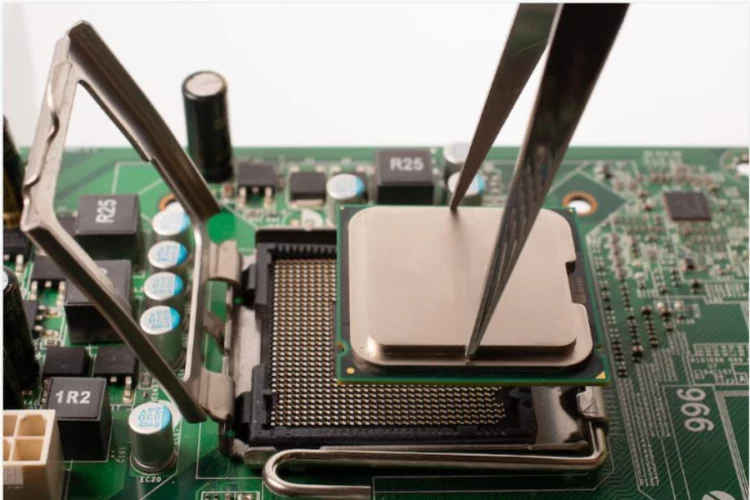
Most motherboards feature a lever or latch mechanism to secure the CPU in place. Lift or unlock this mechanism carefully. It’s crucial to handle it gently to avoid damaging the CPU socket or any surrounding components.
4) Lift the CPU from the Socket
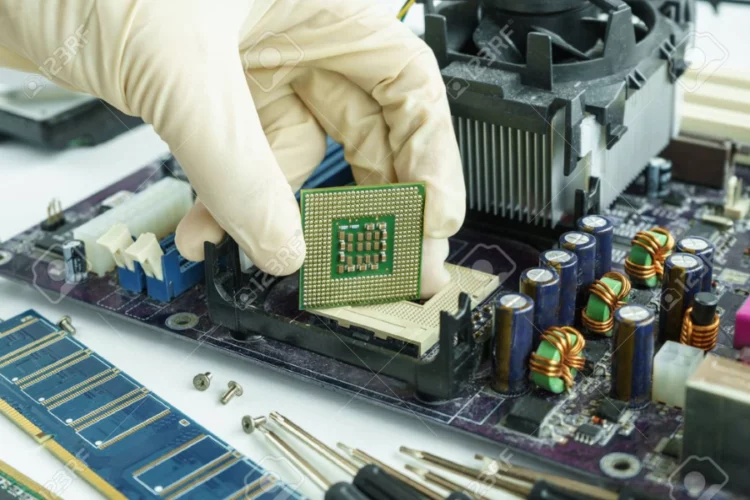
Once the socket is unlocked, gently lift the CPU from the socket using the edges. Avoid touching the CPU pins or the contact surface on the bottom. Hold the CPU vertically to prevent accidental damage.
5) Check for Thermal Paste
If your CPU was mounted with thermal paste, inspect the surface. If it’s dried or uneven, clean it using isopropyl alcohol and a lint-free cloth. Be thorough but gentle to avoid damaging the CPU.
6) Store the CPU Safely
Place the removed CPU in an antistatic bag or on an antistatic surface. This prevents electrostatic discharge and protects the CPU from potential damage.
Related Article: Which Function Does a Motherboard’s Chipset Perform?
How to Remove a Stuck CPU from a Motherboard?
If a CPU seems stuck, avoid using excessive force, as this can lead to damage. Gently wiggle the CPU from side to side while applying slight upward pressure. If the CPU remains stuck, recheck for any locking mechanisms or screws that may still be holding it in place.
How to Remove CPU Socket from Motherboard?
Removing a CPU socket from a motherboard typically involves unscrewing it. Consult your motherboard’s manual for specific instructions. However, keep in mind that removing a CPU socket is a more advanced task and is not necessary for routine CPU removal.
How to Remove CPU Cable from Motherboard?
There isn’t a specific cable dedicated to the CPU on a motherboard. However, if you are referring to the CPU fan cable, gently unplug it from the motherboard before removing the CPU cooler. Ensure the computer is powered off before attempting this.
How to Disassemble a Motherboard’s CPU?
If your goal is to disassemble a motherboard for maintenance, it involves removing various components, including the CPU. Follow the steps mentioned earlier for removing the CPU, and proceed with caution when handling other components.
Taking Out CPU from Motherboard: A Step-by-Step Guide
Reiterating the step-by-step process of taking out a CPU from a motherboard emphasizes the importance of a systematic approach. Following a well-defined guide ensures that each step is executed correctly, minimizing the risk of damage to both the CPU and motherboard.
Yes, it is possible and necessary to remove a CPU from a motherboard, especially when upgrading, troubleshooting, or performing maintenance tasks.
If a CPU seems stuck, avoid using excessive force. Gently wiggle the CPU from side to side while applying slight upward pressure. If the CPU remains stuck, recheck for any locking mechanisms or screws that may still be holding it in place.
Removing a CPU socket from a motherboard typically involves unscrewing it. Consult your motherboard’s manual for specific instructions. Keep in mind that removing a CPU socket is a more advanced task and is not necessary for routine CPU removal.
There isn’t a specific cable dedicated to the CPU on a motherboard. However, if you are referring to the CPU fan cable, gently unplug it from the motherboard before removing the CPU cooler. Ensure the computer is powered off before attempting this.

