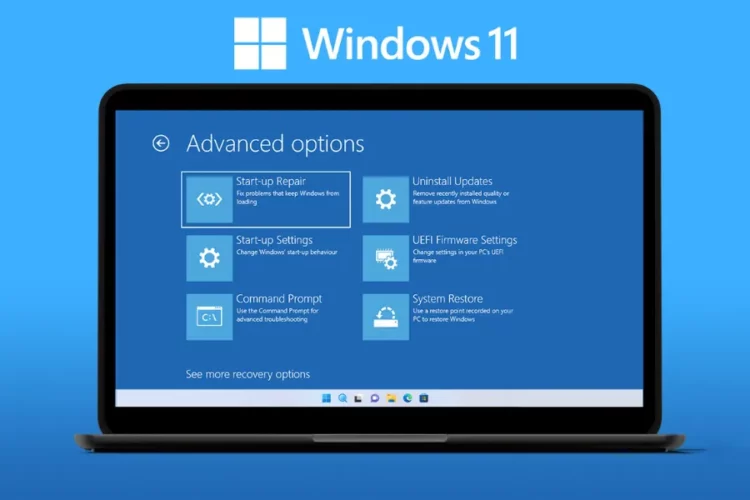
Unlocking the full potential of your Windows 11 experience often involves navigating the intricacies of the BIOS (Basic Input/Output System). In this extensive guide, we’ll explore everything from understanding what BIOS is to various methods on how to open BIOS in Windows 11. Whether you’re a seasoned user looking to tweak system settings or a novice seeking insights into the BIOS world, this article is your definitive resource.
What Is BIOS?
BIOS, or Basic Input/Output System, is a fundamental component of your computer’s firmware. It initializes hardware components during the boot process, ensuring a seamless handover to the operating system. Think of it as the behind-the-scenes conductor orchestrating the symphony of your computer’s hardware.

When to Use BIOS?
- Hardware Configuration: Adjust settings for components like CPU, RAM, and storage devices.
- Boot Order: Modify the sequence in which the system boots from various storage devices.
- Troubleshooting: Resolve hardware-related issues or conflicts.
- Security Settings: Enhance system security by configuring password and encryption options.
How to Get to the BIOS in Windows 11?
1) Computer Start-Up:
- Power off your computer.
- Power it back on and immediately start pressing the BIOS access key (commonly Del, F2, or Esc).
- The system will enter the BIOS setup utility.
2) Windows Settings:
- Open the Start menu and click on “Settings.”
- Select “System” and then click on “Recovery.”
- Under the Advanced startup section, click on “Restart now.”
- Once the system restarts, choose “Troubleshoot” > “Advanced options” > “UEFI Firmware Settings.”
3) UEFI Firmware Settings:
- Access UEFI Firmware Settings directly from Windows Settings or during the system boot process.
- Configure UEFI settings for a more modern and secure boot process.
4) Restart Your Computer:
- Open the Start menu and click on the power icon.
- Hold down the Shift key and click “Restart.”
- After the restart, choose “Troubleshoot” > “Advanced options” > “UEFI Firmware Settings.”
5) Make a Shortcut:
- Create a desktop shortcut directly leading to UEFI Firmware Settings.
- Right-click on the desktop, choose “New,” and then “Shortcut.”
- Enter shutdown /r /fw /t 0 as the location for the shortcut.
Enter Windows 11 BIOS by Pressing a Key
Entering the BIOS by pressing a key involves accessing the BIOS setup utility during the computer’s startup process. Different manufacturers use different keys to initiate this process, commonly including Del, F2, F10, or Esc. Here are the steps:
- Power Off Your Computer: Shut down your computer completely.
- Power It Back On: Turn on your computer and, during the early stages of the boot process, start pressing the designated key for accessing the BIOS. This key is typically displayed on the screen or mentioned in the device’s manual.
- Navigate to the BIOS: If successful, your computer will enter the BIOS setup utility, where you can configure various settings related to hardware and system behavior.
Enter the BIOS on Windows 11 From Settings
In Windows 11, you can also access the BIOS through the Settings menu. This method provides a user-friendly approach:

- Open the Start Menu: Click on the Start icon in the bottom left corner of your screen.
- Go to Settings: Select “Settings” from the Start menu.
- Access Update & Security: Within the Settings menu, click on “Update & Security.”
- Choose Recovery: In the left sidebar, select “Recovery.”
- Restart Your Computer: Under the “Advanced startup” section, click on “Restart now.”
- Navigate to UEFI Firmware Settings: Once your computer restarts, select “Troubleshoot” > “Advanced options” > “UEFI Firmware Settings” to enter the BIOS.
Enter Windows 11 BIOS by Clicking Restart
This method allows you to access the BIOS settings through the Windows Start menu:
- Open the Start Menu: Click on the Start icon.
- Access Power Options: Click on the power icon.
- Hold Down the Shift Key: While holding down the Shift key, click on “Restart.”
- Choose UEFI Firmware Settings: After the restart, select “Troubleshoot” > “Advanced options” > “UEFI Firmware Settings.”
Enter Windows 11 BIOS Using Windows Terminal
Advanced users can utilize the Windows Terminal to access the BIOS directly:
- Open Windows Terminal: Launch the Windows Terminal with administrative privileges.
- Use Command: Enter the command shutdown /r /fw /t 0 and press Enter.
- Restart into UEFI: This command will restart your computer and take you directly to the UEFI/BIOS settings.
How do I check my BIOS version on Windows 11 HP?
Checking the BIOS version on an HP device running Windows 11 involves using the System Information tool:
- Open System Information: In the Start menu, type “System Information” and select the corresponding app.
- Navigate to System Summary: In the left pane, find and click on “System Summary.”
- Check BIOS Version: Look for the “BIOS Version/Date” entry in the right pane. This will display the current BIOS version installed on your HP device.
Yes, you can access the BIOS on most Windows 11 computers. The specific key or method may vary, so refer to your device’s manual.
UEFI (Unified Extensible Firmware Interface) is a modern replacement for traditional BIOS. It offers improved security, faster boot times, and support for larger storage drives.
While changing BIOS settings carries risks, most changes can be reverted. Follow instructions carefully, and avoid altering settings you don’t understand.
Yes, you can update the BIOS on an HP device. Visit the official HP website, find your device model, and follow the provided instructions for BIOS updates.
Checking your BIOS version can help you determine if updates are available. Updated BIOS versions often include bug fixes, security patches, and performance improvements.

